

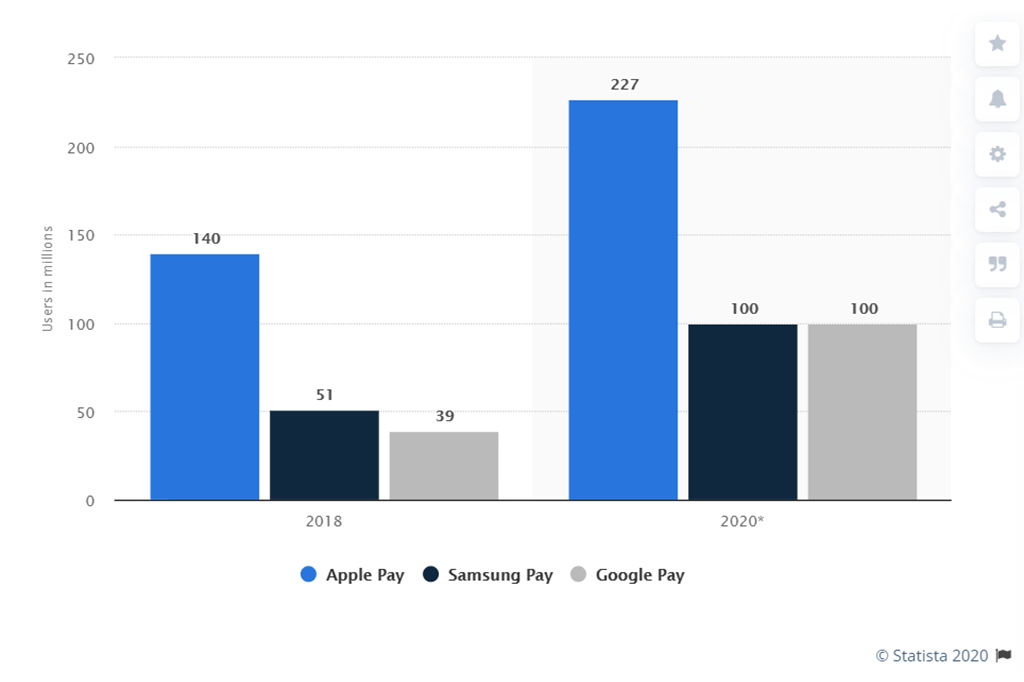
Google is a leading company whose primary goal is to create services that will make the work and life of ordinary users convenient. One such service is their personal Google Pay payment service. The service carries a huge number of advantages, the main ones: unsurpassed ease of shopping and a security system consisting of several layers. This payment service is top-rated, and if we follow the Statista website’s assumption in 2020, the total number of its users should reach 100 million users. And you can be sure, Google Pay is a great solution for your Magento 2 store.
Now to the great news. Recently, every Magento 2 store owner can connect the payment to his business using Google Pay. This all became possible since Google released the official extension for Magento 2 free.
You most likely want to join the huge number of stores that are already actively using Google Pay and thus increasing customers’ shopping enjoyment. Let’s take a look at how to install and configure it in a Magento 2 store.
Table of Contents
Preparations
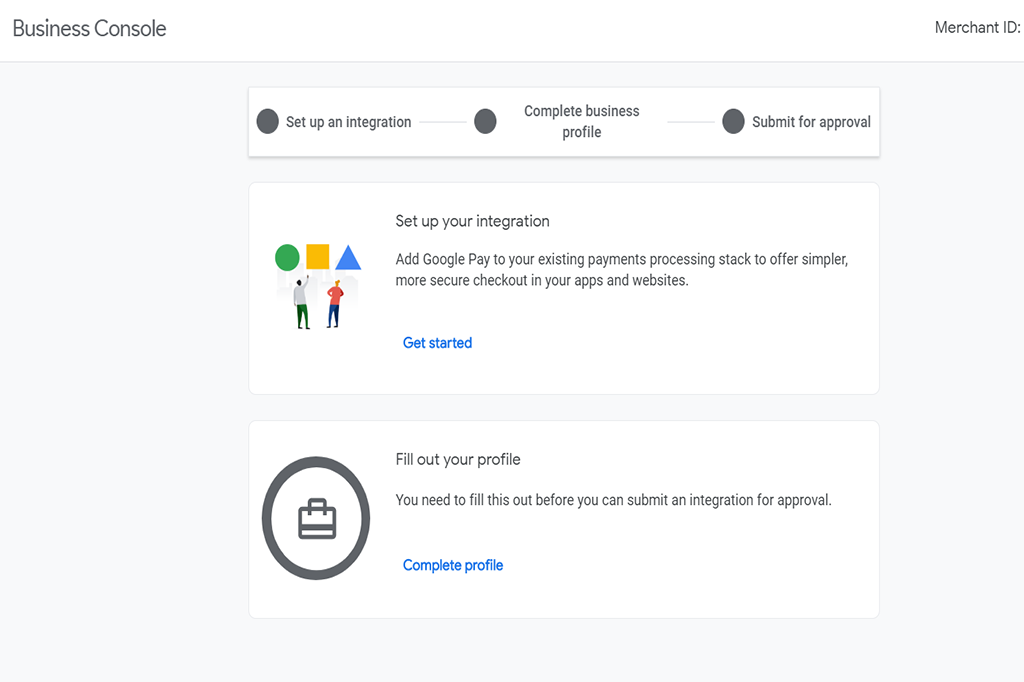
Before installing the extension to Magento 2 store, you need to get your personal ID of the merchant. You can get it in a Google business console. To do this, simply fill in the name of your business, indicate the country, and be a registered user of other Google services. This ID will come in handy later when setting up the Google Pay extension itself.
How to Install Google Pay Magento 2 Extension?
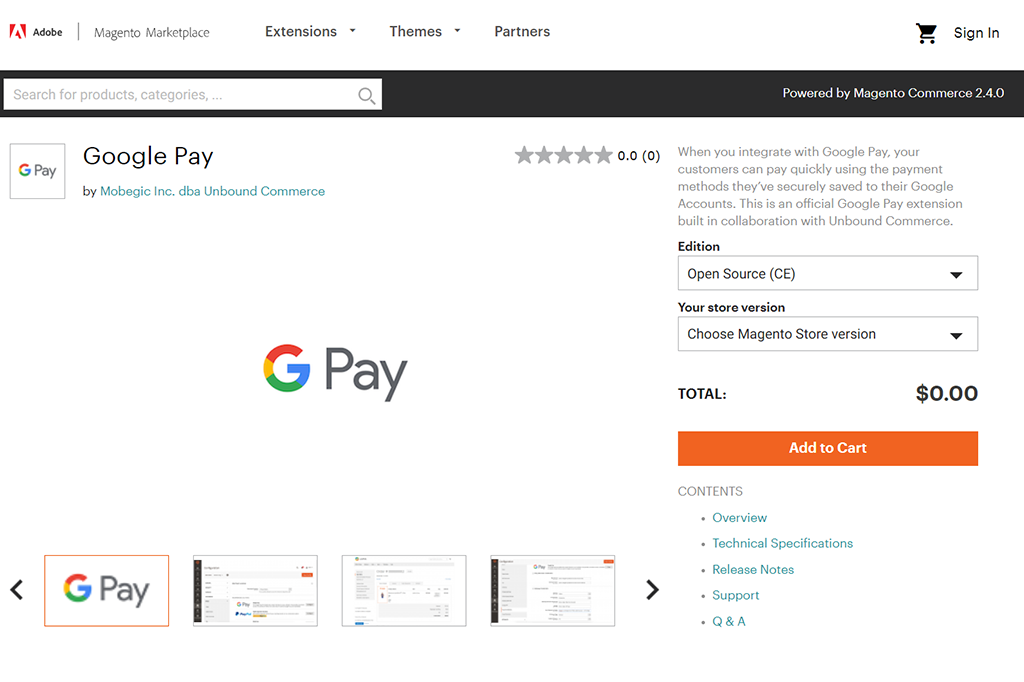
First things first, find the extension in the official Magento 2 store. To do so, just type Google Pay in the search bar or follow this link. Then just install it by clicking the Add to cart button. Everything happens in the same way as with other extensions in the Magento 2 store.
Google Pay Extension Set Up
After you have installed the extension, you have to configure it to work as it should. All configuration is carried out through the admin panel, so you don’t need to go anywhere else, everything is very convenient. To start configuration, you need to do the following steps:
- Go to the admin panel and find the Stores section.
- Go to Configuration, then click on Sales, and finally enter the Payment Methods section.
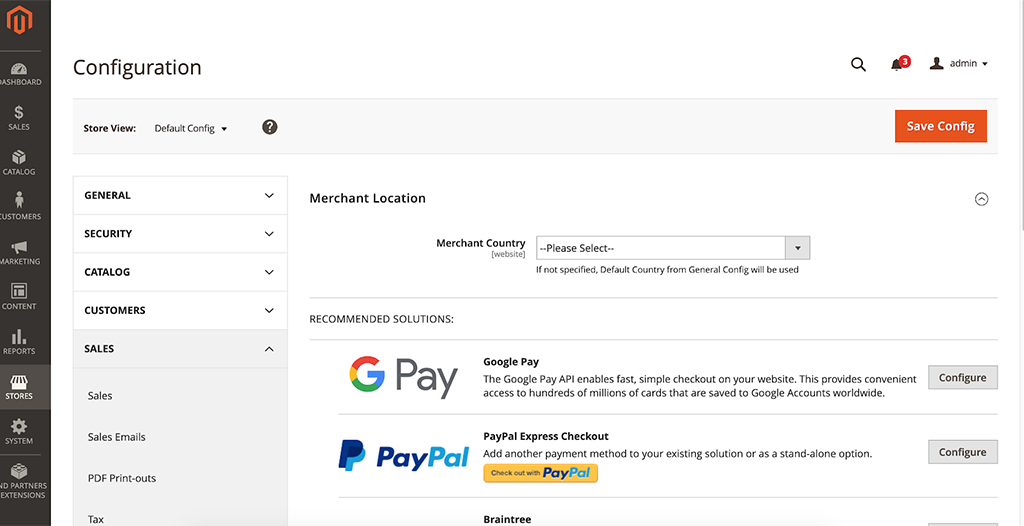
You will see all the payment methods available to you, and among them, there will be a freshly installed extension. To start configuring it, click on the Configure button near to Google Pay payment method.
Now it’s time to use the Seller ID that we created earlier in the Google Business Console. To do this, you need to enter this ID in the field of the same name in the settings section. You also need to fill in the field with the seller’s name and enter the name that you specified when creating the seller’s ID.
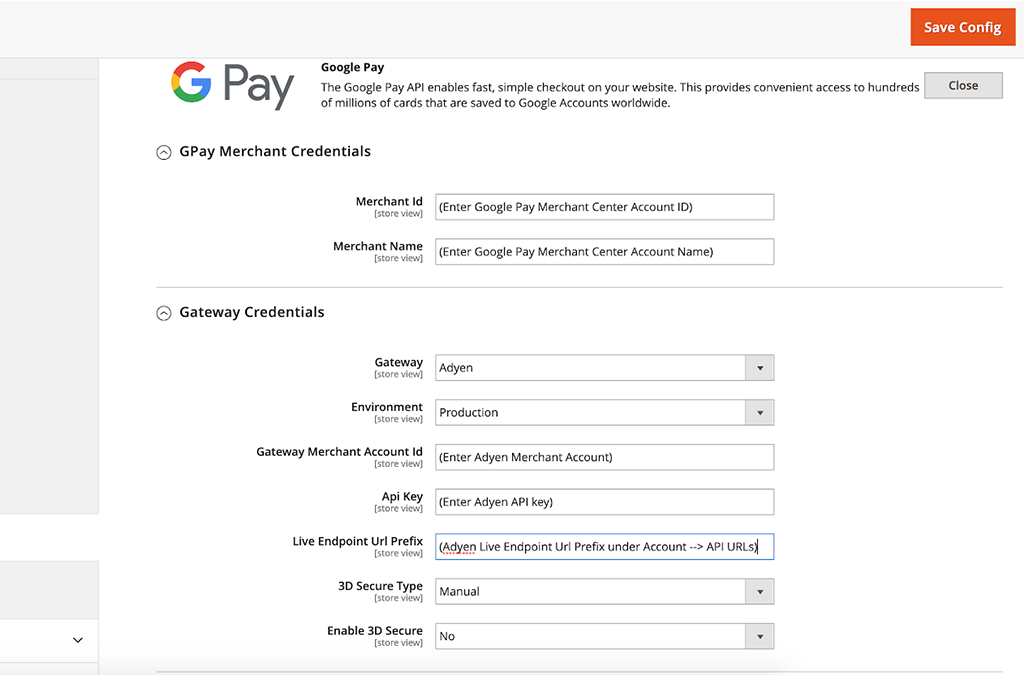
When it’s done, choose a convenient gateway in the field with payment gateways. To do this, just click on the field and select your preferred gateway from those supported by Google Pay. If the desired payment gateway is not listed, most likely it is not yet supported by it.
The final step in the basic setup is to select the cards you want to accept in your store. To do this, simply go to the Google Pay settings and specify your preferred maps.
Additional Settings
If you want more in-depth customization of the extension, we advise you to look at the additional settings section. Many useful functions will transform the appearance of the extension and its functionality. You can change the colors and format of the Google Pay extension buttons, as well as add the Google Pay display to the Minicart. Together with Google, we strongly recommend that you enable the last setting.

Testing
If you want to test the extension before the full launch of Google Pay in your store, you just need to enable sandbox mode in the extension settings. This will allow you to get acquainted with the functionality of the extension and make sure that everything works as it should. Furthermore, you will see the appearance of the extension at all stages of interaction with it.
Google Pay Launch
You have gone through all the stages of configuring the Google Pay extension, tested it in the safe sandbox mode. And now you want to fully run it in your store. This process is also quite simple. To do this, go to your personal Google account and go to the business console. After that, you need to fulfill the requirements, provide the URL of your site, and website screenshots. After that, Google Pay will fully work on your Magento 2 store.
Wrapping Up
Google Pay is an excellent payment service that is becoming more and more popular every year. This is because Google is involved in many aspects of life, and we can no longer imagine ourselves without Google services. This is already a guarantor of quality and a convenient ecosystem of services. Besides, the payment has unsurpassed data protection, a user-friendly interface, and a simple work algorithm, which is highly appreciated by buyers on the Internet.
Adding a described payment method to your Magento 2 store is an excellent strategic business development step that will pay off very quickly. You will notice how your income and conversions grow, and your customers will be satisfied with the convenient process of paying for purchases through Google Pay.
That’s all for now. We hope you found this article helpful. If you have any questions regarding Magento 2, do not hesitate to write to us, and our Team of Magento 2 Developers will advise you on all your questions.


Published in: